Thursday 28 March 2013

DIY Kumihimo Disc

I can't remember exactly how it came about, but a comment from my talented bead soup partner Karen Mitchell gave me the urge to have a go at kumihimo.

Being a wee bit in the sticks I can't just pop out and buy art and craft supplies at my nearest shops and being impatient and I couldn't be doing with ordering online and waiting for one to turn up. So I had a go at making one myself.

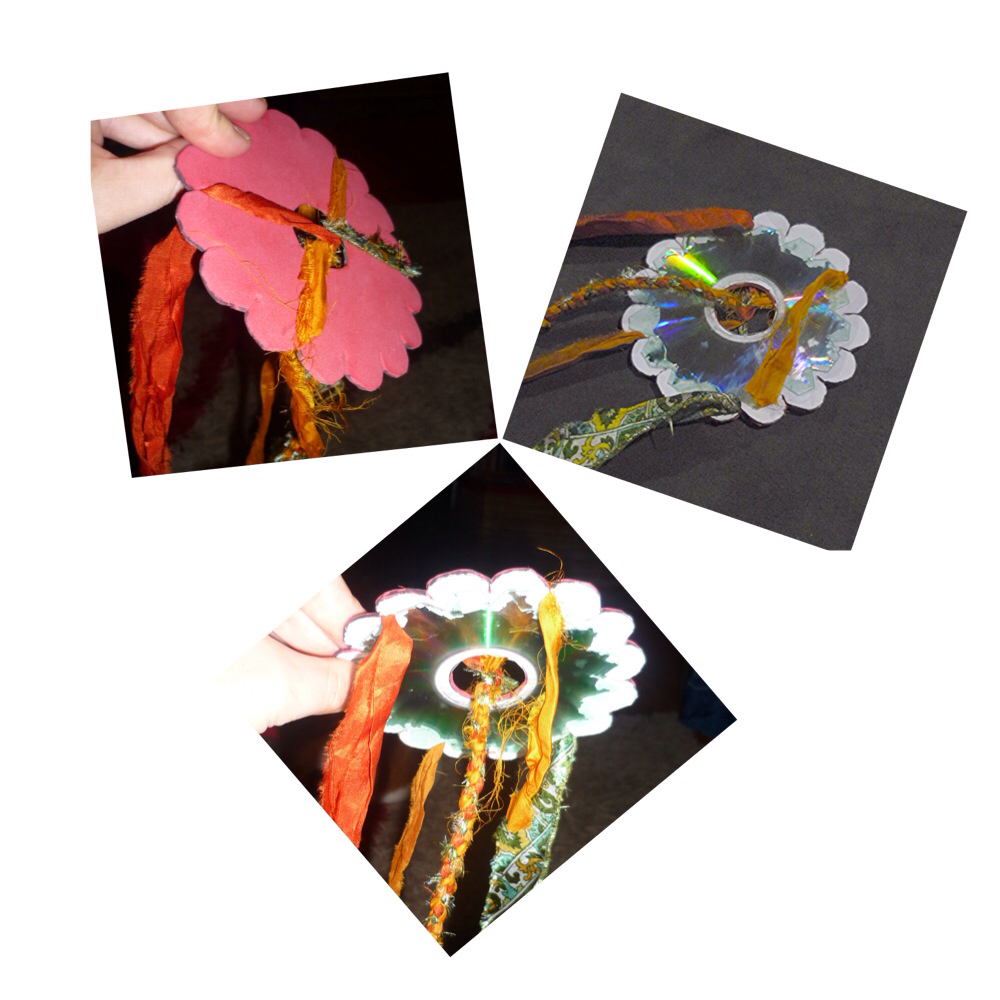
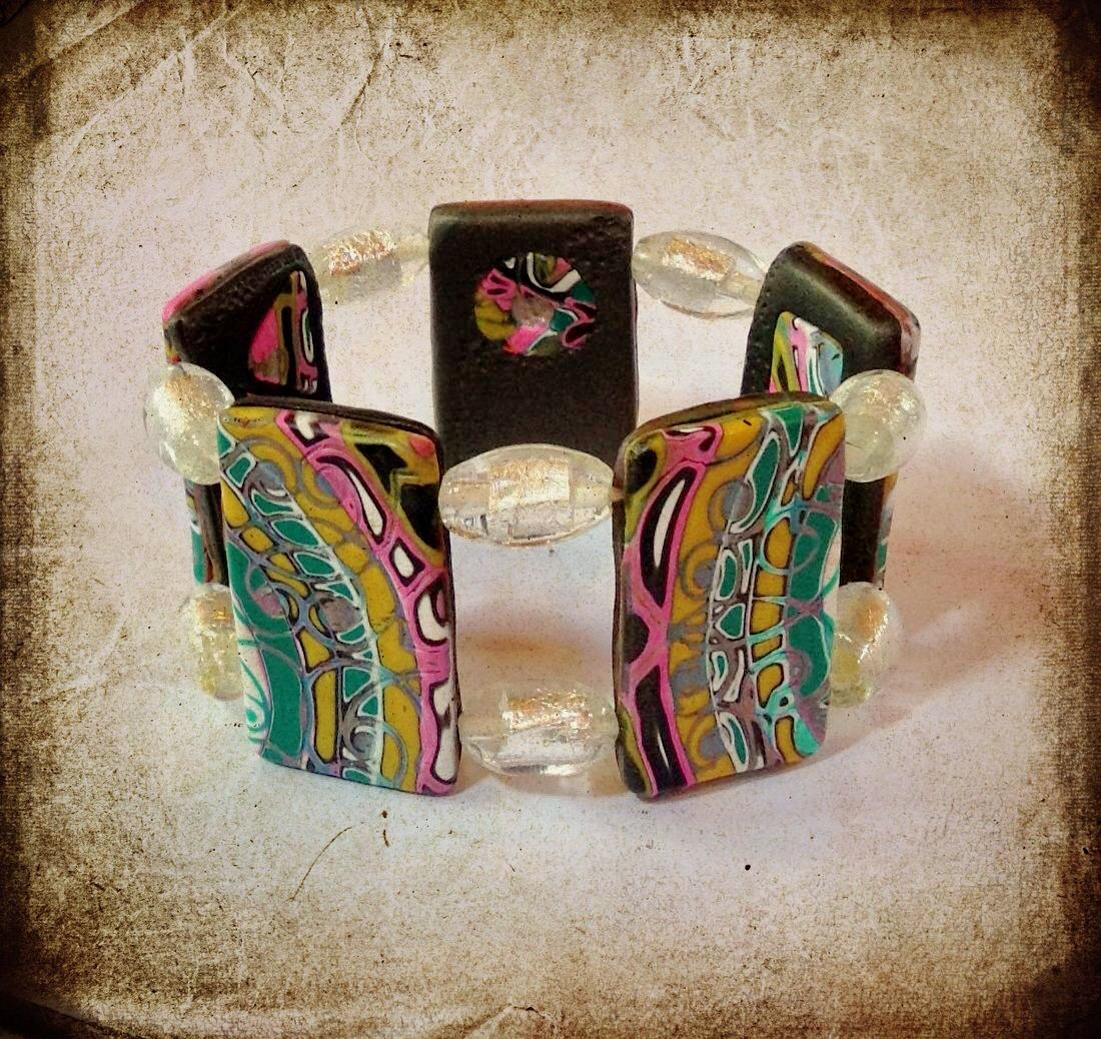
Tada! My amazingly crappy looking contraption made from an old CD, a bit of craft foam I found in my kids art box, copious glue and a now extremely blunt pair of scissors. But it works really well. I can't show you my completed items because they're for the BSBP party (although I have somewhat given it away in the pics above).

Now for all of the effort it took to make compared to how cheap kumihimo discs are to buy I would suggest just getting a new one but if you really fancy having a go at making one yourself then here's how to do it:

1) Get yourself a CD you don't mind ruining and measure the diameter.

2) Hop over to http://friendship-bracelets.net/wheeldesigner.php to design yourself a template. Set the diameter to your CD diameter and choose the number of strings you're going to use. Personally I would suggest no more than 8 strings because it gets way too difficult to cut enough slots in your CD for more than that.

3) Print out and cut out your template and lay it on top of your CD. Don't glue it yet! Draw around the template, using a permanent marker, onto your CD.

4) Using a strong pair of scissors that you don't really care about roughly cut out the shape you've just drawn onto the CD. Perfect doesn't matter here, the CD is there to give you stiffness and strength that cardboard or foam alone won't give you. And you need the extra cardboard /foam on top because the CD edges will wear your threads. So I recommend making more of a star shape than worrying about nice curved edges. You can see in my pictures that the CD ended up being cut to a lot smaller size than the final disc and that the slots in the CD are more valleys than slits. It's the slits in the foam that hold your cords/threads in place.

5) Now find your self a bit of foam, or failing that, glue a few layers of card board together and glue your paper template on top of your foam/cardboard. Once dry, cut out your kumihimo disc shape - nicely this time - and give yourself a wee bit extra slit than suggested by the template for extra holding power.

6) And the final step is to glue your mutilated CD onto the bottom of your foam/cardboard kumihimo disc. I can't remember what glue I used, some general purpose craft glue I think, I wouldn't have used superglue because I can't be trusted not to glue myself together.

Once your glue is dried there aresome nice easy instructions on the friendship bracelet site here.

All in all it took a good hour to make and another 24 hours for the glue to be properly dry. A messy make but it does do the job and I made some really nice things with it.

I had so much fun making kumihimo cords that I bit the bullet and bought myself a proper one online.

From making my own I realised that the thicker the foam, the stiffer the disc will be and the easier it will therefore be to use. No one likes a floppy disc! (Bad IT humour - sorry)!

And those tiny little ones might seem appealling because firstly they are the cheapest and secondly they are so weeny you can pop them in your pocket and take them anywhere. BUT the smaller they are, the harder they are to use and the bigger, 'normal' size ones are just as portable and fit nicely into your average handbag for on-the-move-anywhere-braiding.

So I highly recommend the 6" Kumiloom pictured above (no, I don't get paid for recommending them unfortunately).

It's way thicker than the beadsmith version and the straight, rather than round, sides make it a breeze to remember where you were if you have to put it down.

Last I checked it was around 8 US dollars I think (I couldn't find any available in Australia) but if you are just starting out why not treat yourself to a complete starter kit (about 30 - 40 bucks).

The one I got includes 16 bobbins, a proper Kumihimo book, the big kumiloom disc pictured above and oodles of cords and beads as well as clasps AND glue so you can whack out some gorgeous bracelets and necklaces straight away without having to buy anything else.

Sound like a salesman don't I?!? Sorry, I was so impressed with my kumi-kit that I had to share! Now the project kit I bought can be found here or search for "Kumiloom" on ebay.

If you're unsure that this is for you then have a go at making your own first and using bits of wool or even thin strips of old fabric.

As for me, I'm a convert and you'll see me regularly at the beechworth bakery kumi-looming with a coffee while my gorgeous kids are safely locked in the kids area!


Wednesday 27 March 2013

JDK's 5th Do Over Challange

I made an unconscious decision this year to exercise the much under-used right side of my brain and have been getting seriously into the whole blog-hop phenomena. Yep, I've signed up for another one!

The Do OverChallenge is run by the fascinating Jeannie K Dukik and involve re-jigging a piece of Jeannie's that she considers un-sellable.

Now I would post a before picture here but I actually adore the piece that Jeannie has sent me and I suspect that I'm not going to make huge changes because of that. So you'll have to wait for the reveal day on the 21st April! If you are in the USA there is still time to join in - head over to Jeannie's site for more details : http://www.jkdjewelry.com/doovch.html

Jeannie creates some pretty unique beads, components and jewellery, but this is harldy a surprise, she seems a unique person. Have a look at her 'Jeannie Who?' section. Wow! Writer, athlete, hairdresser to the stars, incredible dramas, an eclectic range of talents. The kind of lady you want to sit down with a huge pot of tea and question for hours. I'm not sure I'd ever be as comfortable sharing so much on a blog as Jeannie does but I'm certainly glad she does!

Thanks Jeannie for running this challange! Here's a list of the other participants so far:

Beti Horvath http://stringingfool.blogspot.com/

Charlie Jacka http://clay-space.com/blog

Dagi http://kokopellidesign.blogspot.com/

DiYana Alcalde http://agapecreationsjewelry.blogspot.com/
Donetta Farrinton http://simplygorgeous-donetta.blogspot.com/

Ginger Davis Allman http://thebluebottletree.com/

Jeannie K Dukic http://site.jkdjewelry.com/blog

Kathy Lindemer http://bay-moon-design.blogspot.com/

Lynne Bowland http://www.islandgirlsinsights.blogspot.ca/

Molly Alexander http://beautifullybrokenme.blogspot.com/

Mary Govaars www.mlhjewelrydesigns.com

Mowse Doyle http://mowsemadethis.blogspot.com/

Penny Houghton www.smellynelly.blogspot.com (you are here!)

Renetha Stanziano http://lamplightcrafts.blogspot.com/

Rita Avila http://www.jewelschoolfriends.com/

Susan Delaney www.ladyflowersbysusan.wordpress.com


Wednesday 20 March 2013

Jasper's Gems Colour Palette Design Challenge

Today I had my first weekday child-free morning since, ooh, can't remember. With youngest in 3 year old kinder for 3 hours and eldest just started prep I had 3 whole hours to potter around second hand shops and indulge myself the biggest take-away coffee I've ever seen.

So what shall I do with all this free time? Sign up to another blog-hop! I'm so remote from most of my family & friends that I'm getting a real kick out of connecting with people and ideas this way. I've actually signed up for another challenge too but I'll blog about that one later.

This challenge, being run by Bonnie of Jasper Moon / Jasper's Gems, is to create a piece based upon the colour palettes below.

I'm really tempted to go straight for the palette on the right, but I do have a tendency to go for oranges and browns so I may push myself out of my comfort zone a wee bit and try one of the others. Who knows!

Reveal date is March 31st so be sure to pop back and have a looky-see at everyone's creations. Big thank you to Bonnie for organising!

These are the other participants so far:

www.thevirtualbeadsociety.wordpress.com/

www.allprettythings.ca/

www.beadyeyedbunny.blogspot.co.uk

www.renaissance-jewelry.blogspot.com

www.heavenlanecreations.com

www.shaihasramblings.blogspot.com/

www.smellynelly.blogspot.com (you are here)

www.willowstreetshops.blogspot.ca/

www.laney-izzybeads.blogspot.ca/

Nancy Smith (Blog Address to Come)

www.jaspersgems.blogspot.ca/ (host)


Monday 18 March 2013

Rebel Yell

My home is currently the location of multiple rebellions.

My 5 year old is rebelling against being told what to do. My daughter is rebelling against eating anything that is not a sandwich. Not entirely sure what my other half is rebelling against but it involves lots of complaining, grumpy faces and sitting parked in front of some form of goggle box. As for me I'm rebelling against not having any time off. And I'm sure all the Mum's out there are familiar with that one!

Every fortnight I leave the lot of them to their small skirmishes and immerse myself in clay for 4 hours. I rarely ever get to finish my projects, and if I do, I rarely like them, but I recently made some loud and spangly beads based upon a tutorial by Randee M Ketzel and, when I got back from my 4 hour retreat, I refused to be good little housewife until I'd found coordinating beads and strung them all together.

I love the fascinating patterns created by using Randee's technique and the strange, loud clashes of colours created by using blobs of 'scrap' clay. These loud little beads are my Rebel Yell against the unending piles of laundry, the ever growing stacks of dirty dishes, the piles of clothes that won't put themselves away and the endless all- encompassing dust. Sigh. I'm off to hang out the washing!


Wednesday 13 March 2013

What tiny hands can do.

For Valentines day Irish Mishly published a free Angry Birds video and my son and I made some for Dad. My son liked his so much that Dad only has them 'on loan'. I like them so much that I am sharing them with you.

All his own work and he's only five! He even put a red fence around the red one and made a white base for them all to sit on. My little artist!

Meanwhile my less-than-tiny hands has been having fun with my bead soup and I've almost finished two items. I'm really pleased with what i've done so far. Here's a wee teaser pic:


Monday 11 March 2013

BSBP : A selection of tasty soups

I've finally got a bit of space and time to do some blog-hopping and eye-up some of the wonderful bead soups people have created. Here'a a wee selection of some of my favorites - click on the blog names to take you to the respective blogs for more info (let me know if the links don't work):

Artistry HCBD : Mmmm, look at those beaded beads and rich colours.

Lamplight Crafts : Turquoise is definitely the in color at the moment. Check out the fabulous glass swirls and how the color palette has been chosen to match.

Cobblestone Lane : The only other Penny in the BSBP! More turquoise, but this time matched with warm metals. Beautiful combination.
The WiggleButt Blog : Gorgeous earth and forest palette coupled with lovely nature inspired components.
Beautifully Broken Me : Beautiful, beautiful components and a burst of red and sky blue.

Mrs M Makes : Of course all soup requires a spoon. What an amazing handmade component!

Ida Louise Jewelry : Love this selection of old golds, peaches and browns and look! Some of those fabulous bicone beads that were in my soup from Karen Mitchell!

Beads, Fibres & more Goodness : Wow! A veritable cornucopia!
Pipa the Latest : Beautiful colour palette.
Stringing Fool : Lovely warm pinks and interesting shapes.

I could go on and on and on .... and I'm sure I will on another post!

So inspiring. What I find really interesting is the similarity in colour palettes and materials. Lots of turquoise, dusky peaches, earthy tones and natural or nature inspired components. A collective mind at work or are we all unconsciously influenced by fashion trends? Fascinating.

Fair to say I'm loving my first BSBP and am wriggling like an impatient five year old for the first reveal. Are we there yet? What about now? Are we there now?!?


Sunday 10 March 2013

The Fantastic Four

Lately my Mojo has been limping along, so to give it a kick in the pants I've been learning new techniques and taking inspiration from tutorials and patterns I've purchased online.

I thought I'd share some of my favourites with you. Quite a task in itself because my list of besties is huge, but the four I've listed here have inspired me in unexpected ways.

Extrudinay by Iris Mishly

This is the first set of tutorials I've purchased from Iris and it won't be the last! I love the quirkiness of her designs and every project is achievable. There's none of that "I'm never going to achieve that level of perfection" with Iris. It's more "ooh, I never thought of using it that way". On the pricey side but well worth it. These tutorials will give your creativity a massive boost.


Graduated Color Blends by Ginger Davis Allman

A very well written tutorial and one of the easiest to follow I've come across. The three projects in this tutorial force you to slow down and smell the daisies. These simple techniques make glorious colour graduations available to those who don't want to or don't have the money to invest in pasta machines and all the fancy schmancy clay tools. I spent a blissful four hours in an almost meditative trance manipulating clay and colours.


Snowflake Beadwoven Earrings by Bead Sphere Jewelry

This was one of my first bead weaving projects ever. The first earring took me 6 hours to complete, the second about two hours. I've got wonderful memories of sitting on the porch of a house we'd rented for the week, swearing like a trouper and scattering tiny little seed beads all over the place while the rest of my family explored the beach and made friends with thousands of tiny purple crabs. They came out so beautifully (not mine in the picture though) and I was so proud. I lost one recently and I doubt I'll be able to make an exact replacement so instead that one earring will become a tiny wee pendant or charm. A keepsake from a wonderful holiday and a reminder that even the tiniest thing, when combined with other tiny things can create a fascinating, beautiful structure.


Life's a Charm by Connie Fox

Connie's beautiful bracelet (featured here on the front of the mag where I came across it) left me thinking "Flipping heck! You can do all that with wire?". And although I am absolutely rubbish at wire work I still have a bash now and then. I am constantly amazed and inspired by the work that others do in this simple medium.


So there you go,four of my mojo-starters. Hopefully my mojo will stant dancing and prancing again with the onset of cooler weather. In the meantime there's a whole internet full of tutorials for me to explore.


Monday 4 March 2013

What do you do when you've got the blues?

The past few months, and especially the past couple of weeks, have been really draining for my family. Nothing major, just a whole bunch of niggles and problems that have all come at once and I'm starting to feel trapped again. My inner polar bear is pacing it's man-made enclosure and is roaring to bundle my family up and go explore unknown places.

When I feel like this I seem to completely shut up shop, I don't want to see my friends or chat with acquaintances, I don't even want to socialize electronically (hence no blogging or facebook activity) or by written word and, probably worst of all, my need to create 'stuff' leaves me entirely. All the things that could lift me up and give me perspective on just how tiny my problems actually are seem beyond me.

So after a bit of a rough night I'm giving myself a wee shove and putting finger to keyboard. Might just be the push I need to break out of my own shell.

This picture of my son getting soaked and laughing reminds me there are much better things to think about. But any tips any of you may have for lifting my gloom cloud would be much appreciated.